Thursday, December 31, 2009

Brackets for main accumulator relocation

Worked on the main accumulator relocation.
These dimensions of the hole spacing are for a 1966 D (The last relocation I did), so it doesn't match the bracket for a 1967. I have posted this photo for future reference. Also, this apply to a manual gear box. The main challenge is to get the regulator and sphere between the air duct for the right caliper and the air duct going to the radiator. Also the sphere has to be close to the front cross-member with enough space to be able to remove the sphere for repair. Unfortunately there is not enough space to remove the brake pads without loosing up the assembly (The pads don't ware that fast, so no big deal as far as I'm concerned).


The dimensions of the flat plates are good for a 1966 and earlier brackets. I had to cut the long one to fit the newer bracket.


This is to reinforce the brackets and avoid any vibrations.


It is now painted and drying...

Wednesday, December 30, 2009

Installing components in engine compartment.

Yesterday, I've installed the front height corrector...

... Pedalo...
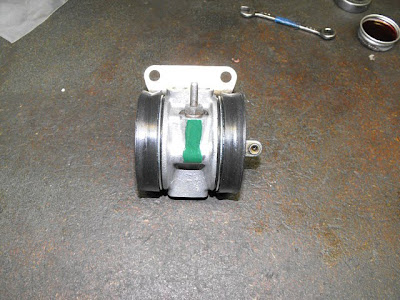
... Front calipers...
... and brake accumulator.


Due to the silicone, the car was equipped with a pressure switch for the brake lights.

It is for a motorcycle originally.


The HP pump is also in place.


Now it is time to tackle the main accumulator relocation...

Tuesday, December 29, 2009

Front suspension cylinders, dampers and balls.

Started on the front right quarter...


I blew air on the suspension return from the back.

Now the back and front connections of the returns are buttoned up. Since it is a 1967, the rubber is supposed to be compatible for LHS and LHM.

The balls on the front suspensions were really rusted.


Tried to clean them but changed them with new ones (9/16" (14.28mm) hard chrome ball grade 100)


Some of the holes in the shock absorbers were clogged. Also, this configuration is before 1963; may be the sphere were change at an earlier stage but the shock absorbers were not updated. I put them back together with the new configuration (Only 2 washers).

The left side is finished.


The rod on the left side was damaged. Thanks to Dremel, I've ground and polished the end of the rod.

Left cylinder now in place.

Started to reconnect the lines on the left side.


Saturday, December 19, 2009

Pedalo.

Starting on the pedalo


From left to right:
- To the front brakes (Male)
- Return (Male)
- From brake accumulator (Female)
- To the rear brakes (Female)

Probably the most difficult part to remove (Between chassis and steering column)

The pedalo is out


I measured the distance of the protruding screw.


I have stacked two 2-114 Orings to replace the original square CS seal (The small Oring is a 2-010)


Ready to be put back together (2 Orings 3.5x20). The small connector Orings are 1.9x4.2


Friday, December 18, 2009

Rear quarter done, front suspension, tank and rubber returns

The rear left quarter is finished. The rear spheres are also installed. David Cossit-Levy in Orange, CT, has rebuilt them for me. He can rebuild and recharge spheres; you can contact him at DCossitt@imshealth.com.

... so is the front height corrector (Was as bad as the rear one).


Working on the front left suspension cylinder...


The replacement O ring for the cylinder is a 2-221


Moving to the returns and tank.

- The bottom opening goes to the tank.
- The small left opening comes from the steering rack.
- Top left comes from the height correctors
- The big top right comes from the main accumulator.


I've remove the bulge on height corrector line to rubber hose connection; It is very hard to fit a reinforced hose to it. In addition, it is a very bad location and if the hose fails, it is going to be easier to replace later.


Height corrector return hose: 8mm x 26 cm.


The returns to the tank (From left to right):

- The leak returns from the height correctors
- Return from the pedalo: 6.35mm x 108 cm
- Suspension cylinders return: 8mm x 92 cm
- Return from the Y (Rack, height correctors and main accu); 10mm x 96 cm


The leak returns from the height correctors go all the way up in the tank.


Thank you silicone fluid!
I've used a sphere O ring for the bottom of filter (2-127); I used petroleum jelly to fit is since it is slightly over-sized.
The top O ring is 3.5 x 38 mm (Or 2-222)

The cap takes a 5 x 35 O ring